

The LinkedLeads API
Where to get a key, and what the API lets you do.
The API is for moving data between LinkedLeads and your own systems — an internal CRM, your forms, a custom application — without anybody doing it by hand.
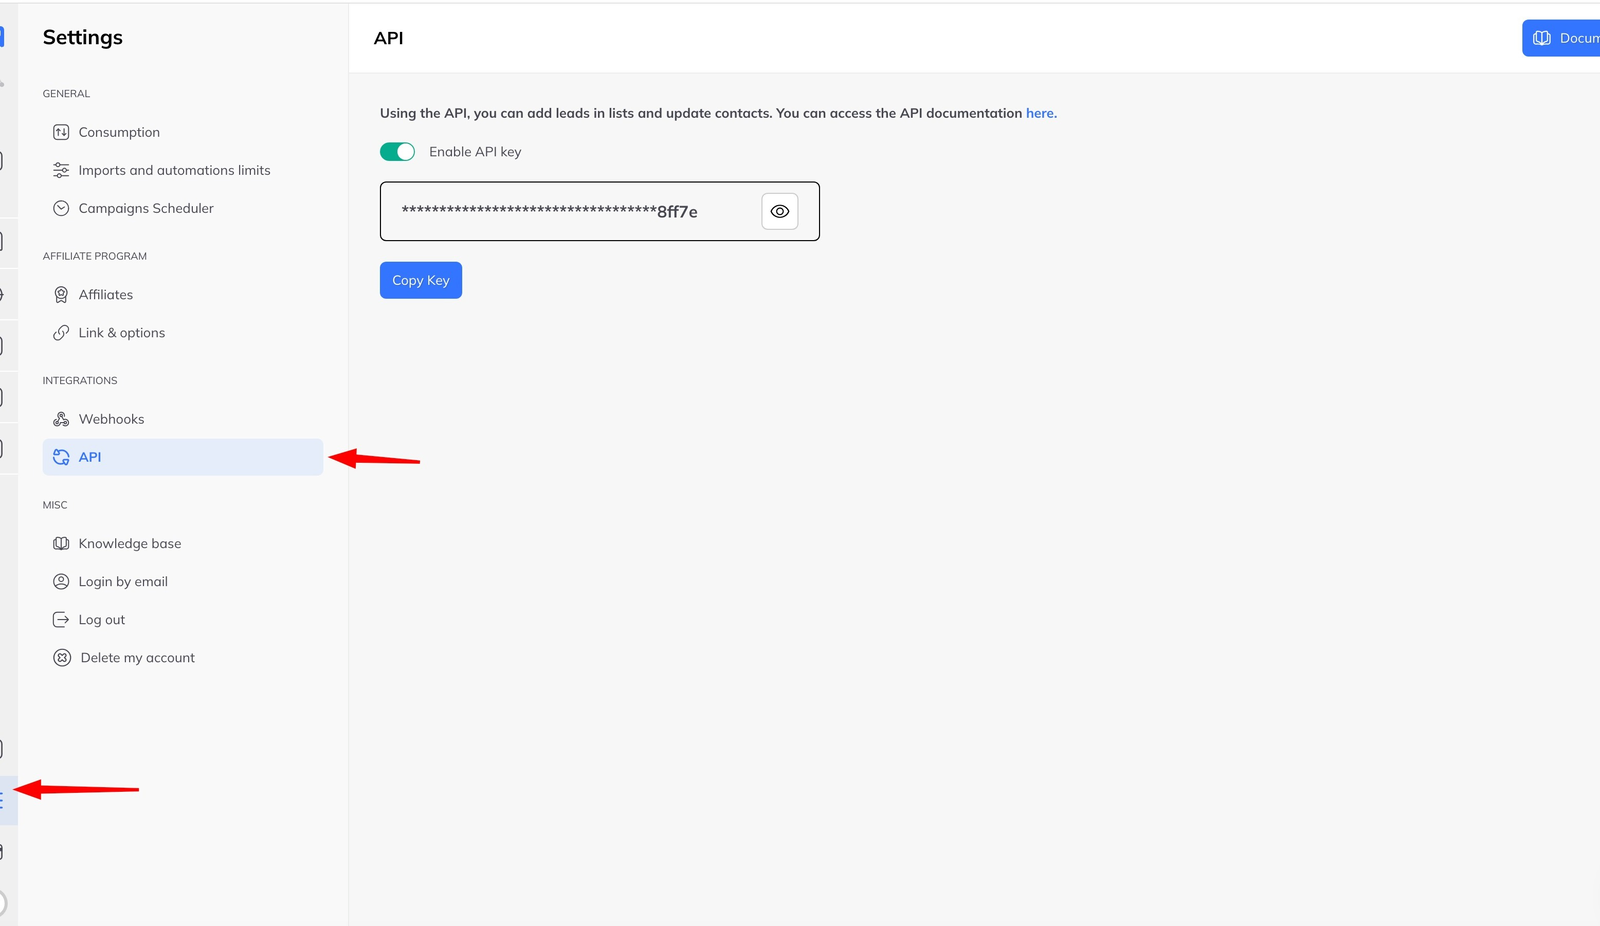
Getting a key
- Open Settings.
- Go to API.
- Enable the API key.
- Copy it.
Authentication
Every request carries the key in a header:
X-API-Key: Bearer YOUR_API_KEY
The key is unique to your workspace and stays the same until you regenerate it.
Leads and members are not the same thing
This distinction shapes how you use the API, and it is worth getting right before you write anything.
A lead is a LinkedIn profile that has been imported. Leads live in the Leads section — collected, but not yet part of your day-to-day work.
A member is a lead that has been drawn into your workspace activity, by being added to the inbox, a pipeline or a campaign.
So: lead = an imported profile. member = a lead you are actually working. Decide which one your integration should create or update.
What it can do
Add leads. Push LinkedIn leads in programmatically instead of importing by hand — from your own prospecting tools, from form submissions, from wherever you collect them.
Update contacts. Change data already held in LinkedLeads, to keep it aligned with a CRM or an internal database.
Build your own integrations. Sync with a CRM, drive internal workflows, push data in from third-party tools.
Typical uses
- Importing leads collected outside LinkedLeads
- Keeping a CRM and LinkedLeads in agreement
- Automating lead intake from forms or internal systems
- Building custom workflows around prospect management
The endpoint reference
Every route, parameter, request body and response schema is documented at api.linkedleadsapp.com/docs.
Before you build
- Keep the key private and server-side
- Read the endpoint reference first
- Be clear about whether your workflow should touch a lead or a member